Tag Archives: DIY

All Washed Up

In the interest of my family’s lungs and saving some dough, I’ve been sniffing around making my own cleaning supplies for the last few months. I’d pinned several different ideas and recipes on Pintrest and I also had an article from Craft Magazine starred in my google reader from 2009. I never had any real gumption around this project, until we ran out of kitchen cleaner a week ago. And all of a sudden we had nothing to wipe down the counters except Lysol wipes. And every time I used one I thought, “Wow, I wonder how much it just cost me to wipe down this counter?” (I’m totally a penny pincher in that regard). We had a leftover almost empty bottle of some kind of over-the-counter cleaner that we pulled out of the back of a cabinet to get us through until we could go to the store, but it smells awful every time it gets sprayed, and it actually aggravated my sinuses when I’d breathe. Not cool, kitchen cleaner. Not cool. Suddenly I had all the gumption I needed to work on making my own cleaners, so after some shopping research (which took me in total, about 1 week), here’s what I ended up with for the project:

IMG_9622

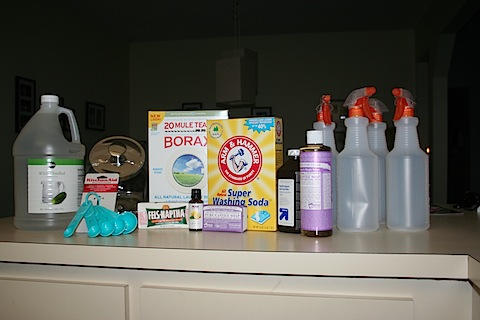
For you fellow list makers out there, here are the ingredients and where I was able to find them (some were surprisingly unavailable in every day stores):

  • Distilled White Vinegar (Publix)
  • A glass container for powdered Laundry Detergent (Target)
  • A new set of measuring spoons (you might not need that, but I did) (Target)
  • Borax Washing Powder (Ace Hardware)
  • Arm & Hammer Washing Soda (Ace Hardware)
  • Hydrogen Peroxide (Target)
  • Dr. Bronner’s Liquid Castille Soap, Lavender (Target)
  • Four spray bottles (Dollar Store)
  • Fels Naptha Bar Soap (Ace Hardware)
  • Essential Oil, Lemon Scent (GNC)
  • Dr. Bronner’s Bar Soap, Lavender (Target)

And for anyone else doing their research, here are the websites I frequented for recipes:

I used Jolly Mom’s recipes for my cleaning sprays, and the Yellowbrick recipe for the laundry detergent.

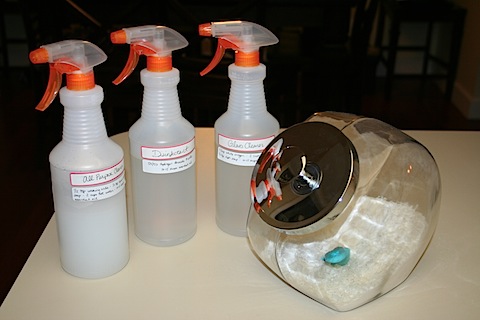
First, I labeled the bottles with some Vera Bradley file labels I had leftover from last Christmas. I’ve used these labels everywhere since T got them for me, and since they’re cute I felt good about using them on my little cleaning bottles. I wanted to label the bottles first so I wouldn’t get confused as I added ingredients (all of the bottles are exactly the same without a label).

IMG_9623

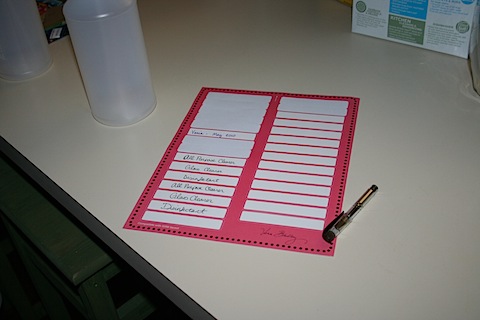
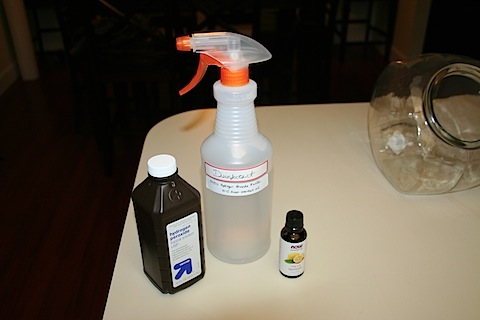
Under the pretty labels, I added a plain white label that lists the recipe right on the bottle, so when I remake everything I can do it without my handy dandy laptop. I decided to make an All Purpose Cleaner, a Glass Cleaner, and a Disinfectant in my spray bottles.

IMG_9624

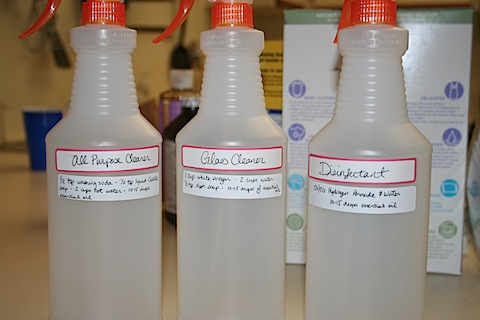
The Disinfectant was the easiest recipe by far. I did 2 cups of Hydrogen Peroxide, 2 cups of water, and 15 drops of essential oil. Put it all in your spray bottle and shake it up, baby.

IMG_9626

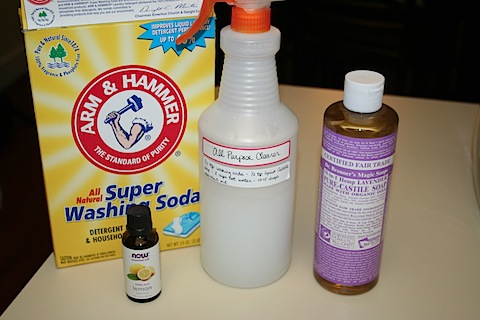
All Purpose Cleaner included 1/2 tsp washing soda, 1/2 tsp liquid Castille soap, 2 cups hot water, 10-15 drops essential oil. Same story, shake and bake.

IMG_9627

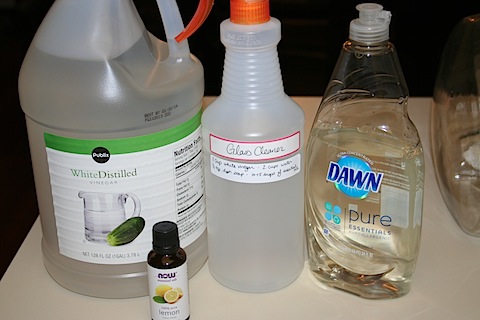
The Glass Cleaner called for 1 cup distilled white vinegar, 2 cups water, 1/2 tsp dish soap (I used what we had in the kitchen), and 10-15 drops essential oil.

IMG_9628

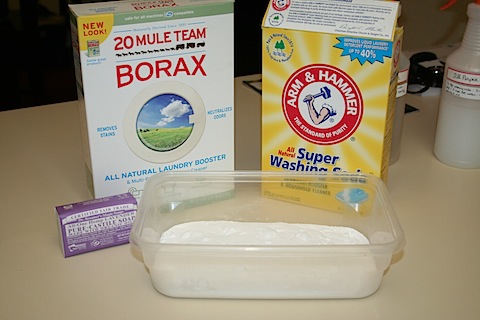
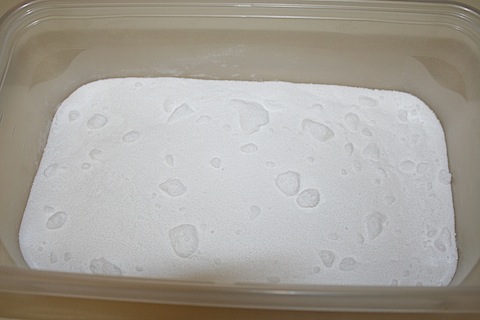
Next came the powder laundry detergent (which I was the most excited about!). I used 1 cup of Borax, 1 cup of Washing Soda, and the whole bar of soap, grated into tiny pieces with a cheese grater.

IMG_9625

When I mixed the powders I had a lot of lovely lady lumps, which I definitely didn’t want. I was hoping for a really well blended mixture so that I got consistent results in the laundry, so I dug into that drawer in the kitchen that has some weird stuff that I never use.

IMG_9629

And I used this thing as my designated lump-breaker-upper.

IMG_9630

IMG_9631

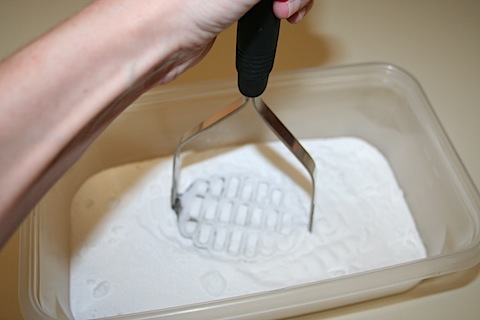
That helped a lot with the lumps. Thanks weird tool thingy! Next I grated up the bar of Dr. Bronner’s Lavender Soap. I had the Fels Naptha bar soap (which most recipes recommend), but it has a warning right on the label that says it’s irritating to skin and eyes, and we have some sensitive skin in our family. After reading through some comments I saw that a lot of people were subbing the Fels Naptha soap for Dove or other less abrasive soaps. I chose the Dr. Bronner’s because it was listed as an alternative and I’ve read really great things about it, and it smells yummy. Once the whole bar was grated I hand mixed it in with the washing powder combo, and I was done.

IMG_9632

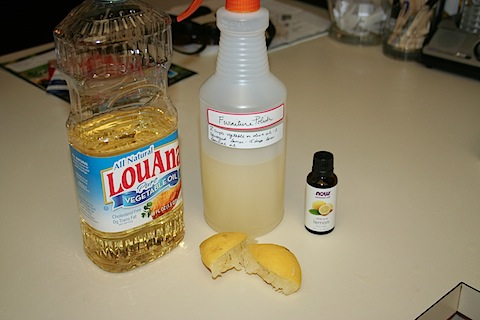
Then I read back through my recipes are realized I had one spray bottle left and enough ingredients for one more spray that I would use often- it’s a Furniture Polish/Stainless Steel Cleaner.

You use 2 cups of oil (she says vegetable or olive is fine), 1 squeezed lemon, and 15 drops of essential oil (man that stuff came in handy for this experiment). So I mixed that up and added it to my fourth bottle.

IMG_9641

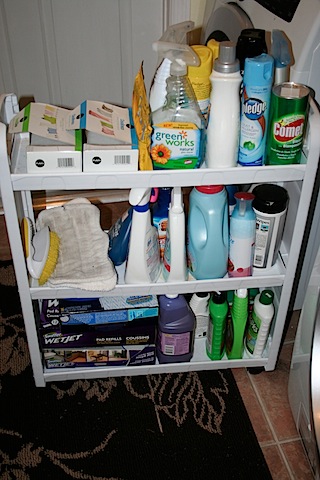
Now that I had all my super cool DIY cleaners made, I had to organize my cleaning cart and get rid of a ton of crap we never use. I’m not sure exactly how we accumulated fifty thousand cleaners that ironically sit and collect dust, but we did. I went through the little cart and removed anything that a) we had never used, or b) I’d just made to replace the chemical version.

IMG_9637

I was left with this:

IMG_9642

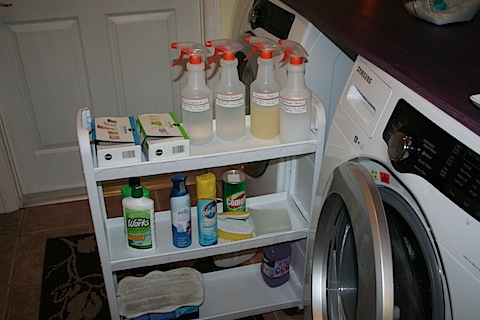
Isn’t that insane? Look at all the room we’d been waisting! I kept a few products that I wasn’t sure if I’d need or not- no sense in throwing away perfectly good stuff that you may need down the line. But anything else that we hadn’t touched in 6 months or more got tossed.

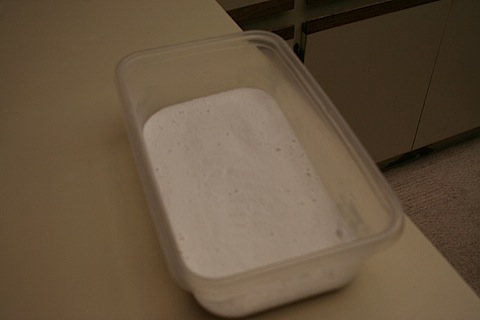
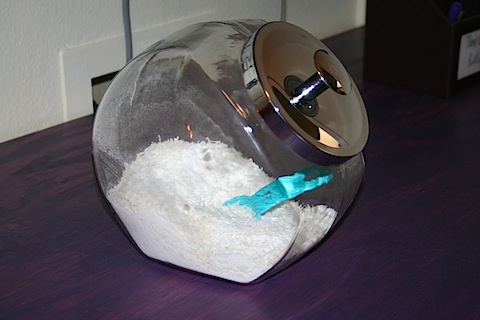
Here’s a close up of how the powder detergent turned out. The recipe recommends 1 tablespoon per load, but I’m using 2 on larger loads (like towels, mostly).

IMG_9634

We have High Efficiency machines (scored at Best Buy on a black Friday sale) so I was concerned about how this detergent would work. But every forum I read said that HE machines do better with “low suds” detergents, and happily, all DIY powder detergents are naturally low suds. I’ve got my 2nd load of towels in the washer now, and being the weirdo that I am I actually stopped the machine mid cycle to see what was going on in there. I couldn’t see any suds at all through the glass in the door, and I was kinda freaking out. But I’m happy to report that once I opened the door the laundry smelled like heaven, meaning the lavender soap was definitely doing it’s thang.

Ok so let’s see if I’m actually saving any money on this.

  • Borax $5.99
  • Washing Soda $4.99
  • Fels Naptha soap $1.49
  • Dr. Bronners Liquid Castille Soap $9.99
  • Dr. Bronners Bar Soap $4.49
  • Peroxide $0.69
  • White Vinegar $1.89
  • Essential Oil $5.00

Grand Total: $33.84

Since the Laundry Detergent recipe has 2 cups of powder plus the soap, and 1 cup = 16 tablespoons, it seems like I’ll get at least 32 loads per batch, which isn’t that impressive until you consider that I have enough of the powder stuff left over to do 4-5 more batches. In fact I have some of everything left over, plenty to do a whole other batch of the cleaners. For non-toxic cleaners that don’t hurt my lungs, I’ll take it any day!

This project was so super fun for me, I loved every part of it (especially smelling my first load of towels washed with my lavender laundry detergent-yum). I think this would be a cute gift if you could find pretty bottles and maybe print your labels online- maybe for a new mom who wants non-toxic cleaners? Or a grandparent who is sensitive to smelly sprays at home? Anyway I haven’t had a chance to try every cleaner, but I did use the All Purpose spray in the kitchen and I’m thrilled to report it easily handles tea stains on the counter and it smells magical. I’ll be truthful about the rest of the cleaners as I use them. Cross my heart.

Leave a comment

Filed under Before & After, DIY Decor, Home Improvement

Let’s Dish, Part II

Our dishwasher has rinsed it’s last, and we had to grab a new one. We found our dream model on clearance so we grabbed her and brought her home (see more in Let’s Dish, Part I). Now we’re ripping out our old dishwasher and installing the new one ourselves.

Google “how to replace a dishwasher” and you’ll get tons of videos, step by step directions, and a list of tools you’ll possibly need. Travis and I each watched some videos independently of each other, so when we converged to install the new dishwasher we were like a super fountain of knowledge (’cause if you see it on the internet, it’s true, right?).

According to everyone in the world, it’s not difficult at all.

Let me outline the steps for you here:

1. Turn off electricity and shut the water line.
2. Disconnect electricity, drain hose, and hot water line from old unit.
3. Unscrew old unit from under the counter lip (ours was already hanging there precariously).
4. Yank the old unit out.
5. Reconnect all of the above stuff on the new unit.
6. Shove the new unit in.
7. Revel in your handyman-ship and wash some dishes.

Here are some tools you might need:

1. Levels
2. A screw driver (flat and phillips)
3. Lots of towels and paper towels
4. Wrenches (an auto fit wrench would be your best bet- I don’t know the technical term for those)
5. Pliers
6. Some plastic bowls to catch drips
7. Flashlights
8. A full tank of gas for Lowes trips (we had 4 total for this project)

If you’ve never had the pleasure of seeing the dark underbelly of your dishwasher, brace yourself. It is a sexy, sexy place.

IMG_9513

We followed the steps to remove the old dishwasher and it wasn’t that painful. The most difficult part was figuring out what size wrench to use on the hot water line (henceforth referred to as the copper piping), and which valve under the sink actually turned off the line that went to the dishwasher (we have something like 5 water lines going different directions under there).

IMG_9510

Once the correct water valve was off (righty tighty, lefty loosey), we disconnected the pipe under the dishwasher. See how it connects to that little 90 degree elbow piece?

IMG_9512

FYI, you’ll want to check your new dishwasher to see if it comes standard with that 90 degree piece. Ours did not.

Anyway, we unscrewed the copper pipe (the hot water line) from that 90 degree elbow piece with a towel underneath to catch the water that was still in the line. Again, make sure the power for the dishwasher is flipped off in your breaker box, since water and electricity don’t mix very well.

IMG_9514

You can see in the bottom right of the pic above the electrical wires that are disconnected. That’s not difficult to do, but I am not an expert so if you’re intimidated, do what we do: call your dad.

Next we disconnected the drain hose (you have to do this on both ends, one is under the sink and the other is under the dishwasher). We had a plastic pitcher under the sink ready to catch the water from inside the drain hose.

IMG_9518

Now the dishwasher was ready to be “yanked out” (the technical term), and we had the perfect helper on hand:

IMG_9521

Who wouldn’t want Coleman the Wonder Dog to help with dishwasher demo? He is a great pal, ready to steal the food off of your plate give you the fur off his back.

Here’s my precious the new dishwasher getting ready to go in.

IMG_9524

For anyone else who’s OCD like I am, let me just show you the biggest stress of the entire event, the State of the Kitchen.

IMG_9601

It was a disaster the whole time, with tools and dirty dishes everywhere. At one point I was going to wash all the dirty ones by hand and get them out of the way, but we had all of the water valves shut off under the sink because we are dumb we weren’t sure which was which and I just gave up.

I don’t have any pictures of us shoving the new washing machine in the hole– that required all four of our hands at once. I will tell you this: leveling the feet of the dishwasher is very important, but you have to time that part just right because first you have to get it partially under the counter. In other words, if you unscrew the feet to make it level before you install it, it will be too tall to maneuver in the space. We got the dishwasher into the hole, then Trav lifted up while I unscrewed the feet to level it out.

Ok here’s where it got nasty. Once we got the washer in place we saw that it didn’t have the 90 degree elbow piece, and we couldn’t get the old one off of the old dishwasher to use, so, we took our first trip to Lowes to grab one. We came home and Travis attached it to the new dishwasher, then we reattached the copper pipe to the elbow, and guess what? It leaked. But not the part where you screw it on, it was leaking on the pipe. Yikers.

We played around with this for a while doing lots of tests (which included Travis getting soaked) and we just couldn’t get the leak to quit. It was a slow leak, but we had no intention of leaving it there. We were concerned we would have to replace the copper piping, but then we called our friend Luke (mentioned here) and he told us about this braided metal piping stuff. He said we could get a small piece to connect the copper pipe to the elbow and it would take some of the tension off of both, and our leak situation would probably be fixed.

So we took trip 2 to Lowes and grabbed one. Here it is installed.

IMG_9598

Success. We are done! All that’s left to do is reconnect the drain hose under the sink, and wire the sucker. I had visions of clean plates dancing in my head.

Travis got all of the electrical wired in and we leveled everything. It was looking good. Then, we noticed something. Something awful.

The copper pipe, the thing we just fixed the leak on…it was leaking again, but on the other end. The end under the sink.

Imagine the swearing.

But, we do our best work under pressure. As we considered calling in a professional to re-install the copper plumbing, Travis had a brainstorm. That little braided metal rope, it was working perfectly. Why couldn’t we just buy 8 of them and stick them all together? Or do they make one long piece? We had no idea, but this little ray of hope excited us enough to make us hop back in the car for Lowes trip number 3 at 7 pm, a mere 8 hours after this project had started.

We have very sophisticated list systems. For example, we needed some wood screws so we could screw the dishwasher into the bottom of the countertop (they all come with brackets for this), but our screws were too long, so I laid the screw on our list and drew a line so we’d know what size to get.

dishwasher 1

Then in the plumbing section, the heavens opened up and the angels sang.

dishwasher 3

An 8 foot dishwasher connector would work perfectly. And, notice anything? It COMES WITH the 90 degree elbow that we went to grab on our first trip to Lowes. If only we hadn’t been so naive. If only we’d had some guidance. If only I could find some Taco Bell.

So we left Lowes feeling pretty confident and slightly delirious. Travis saw a magazine and grabbed it after a headline caught his eye about dishwasher reviews, and wouldn’t you know our very model was in the top 10 (number 8, in fact). I felt pretty darn good that we’d snagged a top 10 review for such a deal. This was just the morale boost we needed.

dishwasher 2

And it was great that we had a morale boost, because this project was not over yet. We were now going to use the 8 foot braided hose to bypass the copper altogether, but we didn’t know if there was a hole big enough in the counter to allow us to run the metal hose under the dishwasher. The new washer was already leveled, the electricity and drain hose were both hooked up, and Travis reeeaalllly didn’t want to have to unhook all of those things and pull the dishwasher out to drill a hole in the counter to run the new hose. Are you with me? We needed a lucky break. And we got one.

IMG_9604

The existing hole for the copper pipe was almost big enough to run the metal hose through too, but not quite, so Travis used a kitchen knife (aren’t we classy) to widen the hole a bit without damaging the brand new perfect dishwasher just on the other side of the wall. Once he got it through, I used my super long skinny arms (go go gadget arms!) to reach under to the very back of the dishwasher and pull the hose forward. And after a few tense moments, I finally got it out. And oh the joy, people. We could see the light at the end of the dishwashing tunnel.

From this point we simply attached both ends of the metal hose, one end to the water valve and the other end to the dishwasher. We crossed our fingers, turned the water on, and guess what?

NO LEAKS.

(victory dance)

We used the patented “paper towel test” while we ran a cycle of dishes, just to make sure we weren’t missing anything. We didn’t install the kick plate at the bottom of the dishwasher until the next day, because I checked under the dish washer obsessively every 10 minutes during the first load, watching for leaks. I’m ecstatic to report there were no leaks, and we didn’t have to replace any copper pipes since we’d bypassed them completely. The icing on the cake was that the 8′ metal supply hose was only $16.98, and I can only imagine how much it would’ve been to replace the copper pipe. What a relief.

IMG_9608

So that’s how we installed our new dishwasher and conquered the world. It was a sweet, sweet, victory my friends. And now you can come eat at our house without fear of leftover food stuck to your fork.

Leave a comment

Filed under DIY Decor, Home Improvement